SharePoint is a native space where you can create sites: team sites, communication sites and hub sites
You will need 2 minutes to create SharePoint site in the Office 365.
You can create and use SharePoint sites for:
- internal team communication
- central document repository
- team mail group aggregation
- building knowledge base
- manage the internal information
Using SharePoint site will allow you to utilize many great features, like:
- News publishing
- Sending newsletter
- Sharing the documents
- Building knowledge base
- Creation of the mail group
- Gathering team notes in OneNote
Do not hesitate and start to create your SharePoint sites.
Creation of new SharePoint team Sites
Learn how to create SharePoint Online team sites. In the first step, you will need to is log in to Office 365
1. Open Office 365
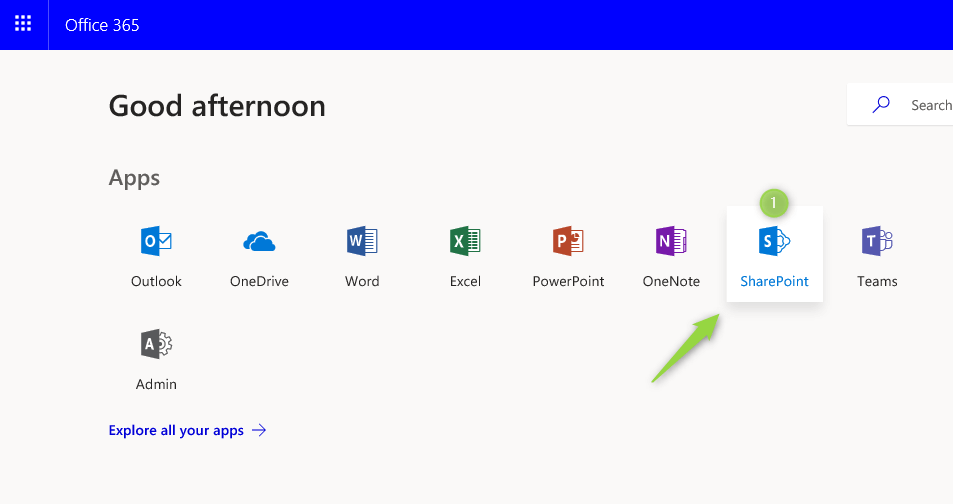
Open Office 365 site using https://office.com address. In Office site choose SharePoint button.
It will open SharePoint site that contains summary from all SharePoint site you have access to.
2. Create the site
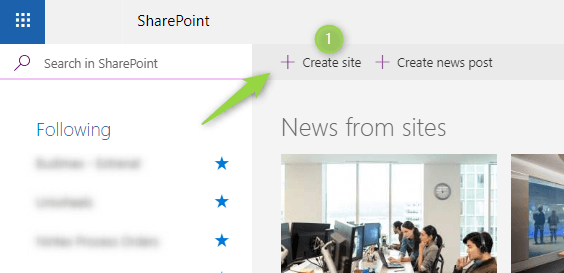
In the SharePoint portal site choose Create site button.
If you cannot find link to Create Site button you will need to contact with your IT service team for the creation of the site. Click here to get the email template that you can send to IT Administrator.
3. Choose site template
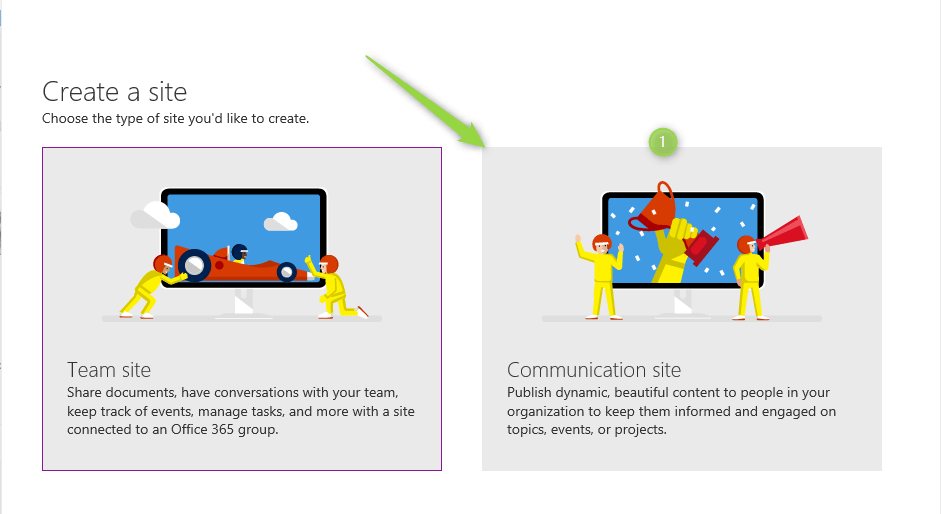
In the next screen, you should choose the Team site button.
4. Generate the site
In the final screen of the wizard, you need to configure your site. To create SharePoint Communication:
- (1) Choose a design – Choose Team Site template.
- (2) Site name – Put your site name. The name will be displayed in the site header.
- (3) Site address – Optionally you can change site address. To edit it you have to choose the edit button (4). I recommend using short and simple addresses for your site.
- (5) Site description – you should put here 2-3 sentences that allow your colleagues to recognize this site.
- (6) Privacy settings – you can choose between Private and Public type of privacy
- Private – only members of your team will have the access to the site.
- Public – you can invite other colleagues to the site and assign them different permissions, like Read, Edit, Full control
- (7) Select a language – Choose here preferred language.
To generate and publish the site click on Finish (8) button.
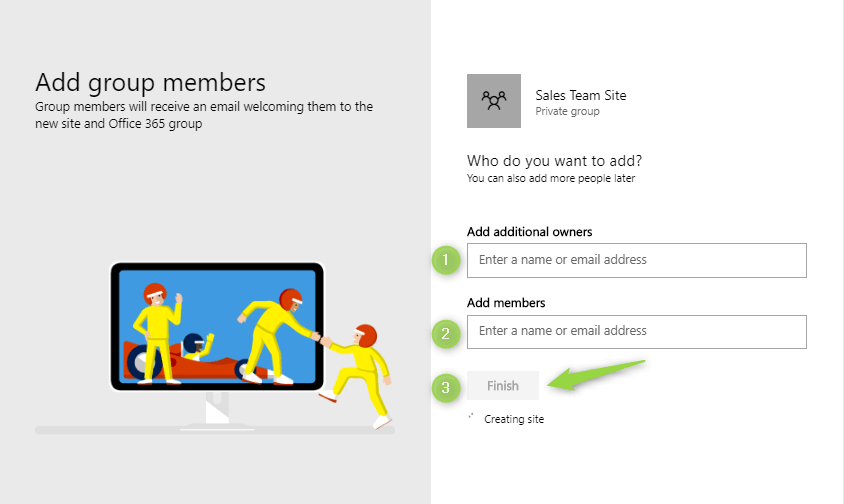
In the next screen, you will be asked to add your colleagues to the site owners (1) with full control permissions or to the site members(2) with edit permissions. After that just choose Finish (3) to create the site.
Your site should be ready in 15-30 seconds. You will be automatically added as a Site Owner.
Creation of new SharePoint communication sites
Learn how to create SharePoint Online communication sites. In the first step, you will need to is log in to Office 365
1. Open Office 365
Open Office 365 site using https://office.com address. In Office site choose SharePoint button.
It will open SharePoint site that contains summary from all SharePoint site you have access to.
2. Create the site
In the SharePoint portal site choose Create site button.
If you cannot find link to Create Site button you will need to contact with your IT service team for the creation of the site. Click here to get the email template that you can send to IT Administrator.
3. Choose site template
In the next screen, you should choose the Communication site button.
4. Generate the site
In the final screen of the wizard, you need to configure your site. To create SharePoint Communication:
- (1) Choose a design – Choose Topic template.
- (2) Site name – Put your site name. The name will be displayed in the site header.
- (3) Site address – Optionally you can change site address. To edit it you have to choose the edit button (4). I recommend using short and simple addresses for your site.
- (5) In this space, you will have the possibility to preview your site full address and check if it is available.
- (6) Site description – you should put here 2-3 sentences that allow your colleagues to recognize this site.
- (7) Select a language – Choose here preferred language.
To generate and publish the site click on Finish (8) button.
Your site should be ready in 15-30 seconds. You will be automatically added as a Site Owner.
5. Share the site
To invite your colleagues just click on Share site button.
In the next screen, you need to choose the username in people field (1). You can use put there:
- Username
- Office 365 Group
- Security group
When the screen will reload you will be able to choose:
- Permission level (2) – You will have permission level options to choose Full control, Edit or Read.
- Send email (3) option – This field gives you the possibility to send the email notification to chosen user.
- Welcome message (4) – You can put here welcome message to the invited user.
Choose Share(5) button to assign permissions.
The additional features offered to Hub sites in SharePoint Online
Site converted to Hub site offers few new interesting features for SharePoint Online.
Unified global navigation in SharePoint
In the hub site you can configure global navigation to all associated sites to the hub. SItes will have unified additional top navigation. To add elements to navigation just click Add link (1) button.
Associated sites
Thanks to option Create site (2) you can create new sites which will be associated with the hub. All associated sites will:
- unified top navigation
- set the same site design
- content in associated sites could be aggregated in the modern web pats
Additional options
You can set additional the Hub site settings (1).
You can set:
- Hub site navigation logo (1) – the dedicated icon which will be used in top hub navigation,
- Hub site navigation name (2) – display name for the link to hub site in the top navigation,
- Site design applied to associated sites (3) – site design that will be applied to sites after association.
How to create SharePoint hub sites
In the first step, you will need to is log in to Office 365
1. Open Office 365
Open Office 365 site using https://office.com address. In Office site choose Admin button.
2. Open SharePoint Administration Center
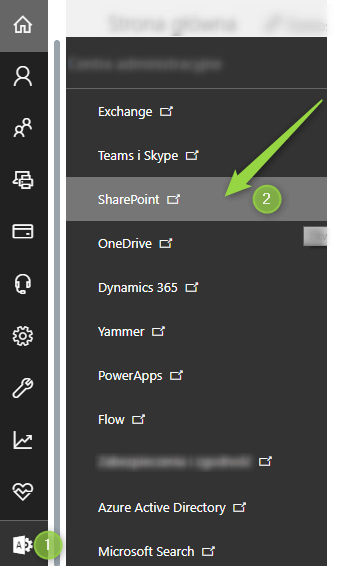
When you will open Admin site choose Admin centers (1) and then SharePoint Admin Center (2).
3. Open New SharePoint Admin Center
Open SharePoint Admin center and switch to the Modern SharePoint Admin portal by Try it now button.
3. Creat Hub site
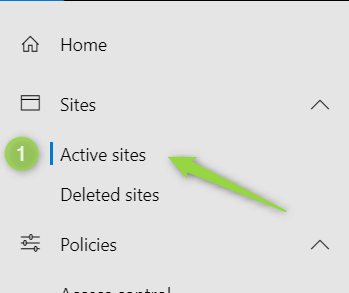
In the navigation choose Active sites section.
Creation of the Hub site is based on converting the existing site to the Hub site. Choose existing modern site collection and choose Hub site (1) and Register a hub site (2).
In the new window, you will be able to convert site to new Hub site by setting Hub site display name (1) and setting People who can associate sites with this hub (2). Creation will be don after Save (3).
The process should take no more than 2-3 seconds. You will site that site is converted to Hub site.
What’s next?
Great! Now you know how to create SharePoint sites. Now is the time to learn a few more tricks about SharePoint Online. Learn how to use SharePoint Lookbook, setup SharePoint Online navigation or send a newsletter from SharePoint Online.
Do you want more?
I prepared more articles around main Office 365 apps, like Exchange Online, Microsoft Outlook, Microsoft Teams and SharePoint Online.
Conclusion
You learned how to create SharePoint sites. Now you can create team and communications SharePoint sites.


